


Coding - Step 0: Setting Up a Development Environment
Articles in this series:
- Coding Step 0 - Development Environments
- Coding Step 1 - Hello World and Makefiles
- Coding Step 2 - Source Control
- Coding Step 3 - High-Level Requirements
- Coding Step 4 - Design
You can easily find a million articles out there discussing compiler nuances, weighing the pros and cons of various data structures or discussing the optimization of databases. Those sorts of articles are fascinating reads for advanced programmers but completely leave in the dust many others. Others asking very basic questions such as ‘How do I use a compiler?’ or ‘How can I code without an IDE?’ These basic questions deserve good answers because they represent the absolute first step that everyone has to take before they can become a veteran programmer: setting up a development environment.
Many new programmers today are not taught how to work with code outside of a strict framework provided by their elders - generally an Integrated Development Environment (IDE) of some sort. Java is one of the more popular introductory languages these days and for the most part, no one develops in Java without an IDE (even though there are plenty of differing opinions as to which IDE is superior). Other languages are following suit - C# doesn’t often stray away from Visual Studio, for example. Meanwhile, if you ask the question ‘What IDE do you use?’ to a variety of C programmers you’ll get a wide variety of answers - some of which will be ‘None’. But C is no longer a the preferred choice for a first programming language, so a large number of new programmers are never exposed to ‘bare bones’ development that some take for granted.
A programmer who doesn’t have to rely on an IDE to do his or her development is a more versatile, reliable and competent programmer.
Setting up a basic development environment without an IDE is not that difficult either. The most basic development environment really only needs three things:
- Compiler: A compiler turns your source code (text) into executable object code (EXEs, DLLs, etc.). GCC is an example of a very popular and well-recognized compiler, but there are plenty of compilers out there for a variety of different target environments (think embedded processors).
- Text Editor: Something to write the source code in. Notepad is the most basic example of a text editor, but there are much more advanced editors out there such as Notepad++.
- Build System: In all but the simplest coding exercises, compiling is a tedious multi-step process. While not strictly necessary, a build system will automate many aspects of compilation. Make is a very popular build system for a variety of languages, while Java may use Ant or Maven.
If you just want to start learning C and compile C code on a desktop PC then you can’t go really wrong with the following combination:
- Compiler: GCC
- Build System: Make
- Text Editor: See below
No one can really argue with the combination of GCC and Make - those two pieces software have been used together for 27 years. That’s an eternity in the computing field. If it was good enough for your parents it’s good enough for you isn’t it? Text editors are harder to recommend - there are quite a few of them to choose from and it’s largely a personal choice. But, since I have to give some sort of direction to initiates I’ll suggest that Windows users start out with Notepad++ and Linux/Unix users start out with nano. They’re both capable but simple to use.
Linux/Unix users have a much easier time setting up a C development environment. Chances are good that you already have all of the tools installed on your machine and if not, you have a package manager you can use to download them. Most likely you know how to do that anyway, so the rest of the article is dedicated to helping Windows users set up their development environments.
It’s rather easy to download and install NotePad++ so I’ll leave out those instructions. Getting ahold of Make and GCC on Windows is actually somewhat difficult. Those programs are part of a collection of software called the GNU toolchain and are native in Linux/Unix, on Windows there are several options for getting the GNU toolchain:
- GNU Win32 - This is a collection of Linux/Unix command-line utilities designed to run on Windows
- MinGW - This is a collection of Linux/Unix command-line utilities designed to run on Windows
- Cygwin - This is a set of programs designed to provide a Linux/Unix environment on Windows
Of the three, Cygwin is the most capable option, but also the most complicated to set up. GNU Win32 and MinGW largely accomplish the same thing with MinGW having a slight advantage in simplicity of installation. For that reason, I selected the MinGW distribution of the GNU toolchain. The remainder of this article details how to install MinGW on Windows.
Setting Up A Development Environment
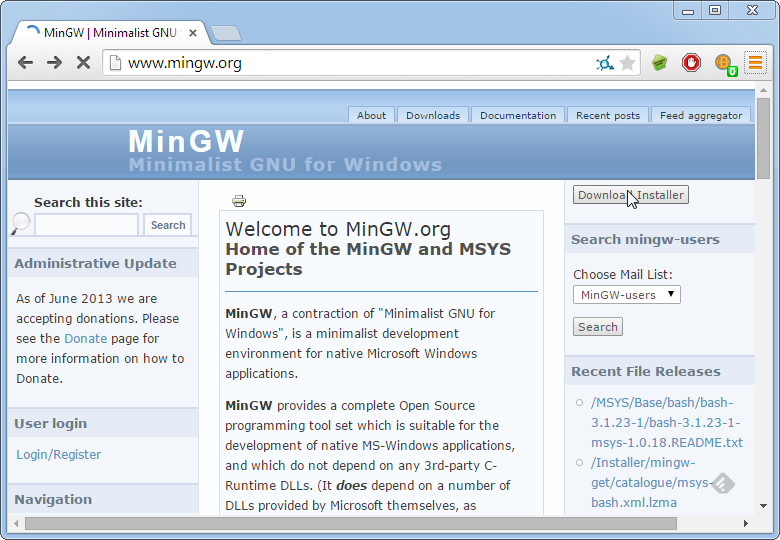
The first step is to download the MinGW installer. The simplest way is to go to http://mingw.org and click on the 'Download Installer' button in the upper right hand corner:
This will download mingw-get-setup.exe. Double click it to start the installation - the first screen will look like this:
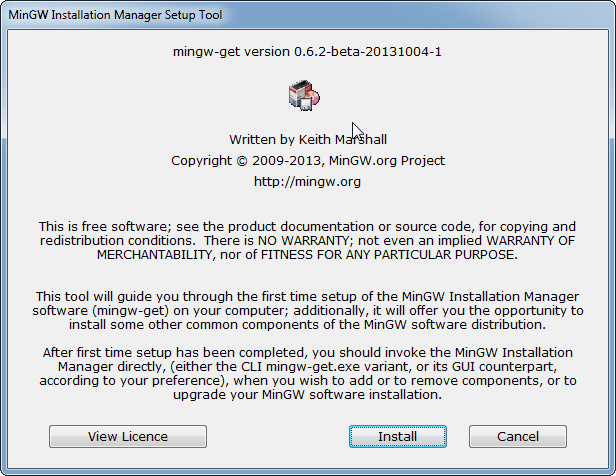
Click ‘Install’. You'll be presented with some options:

The defaults are fine here, click ‘Continue’.
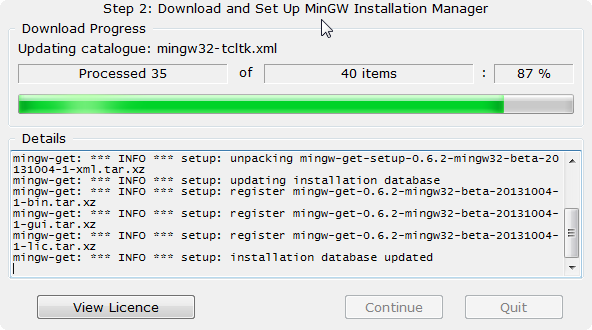
Now it downloads and installs for a while - when done ‘Continue’ will become enabled - click it.
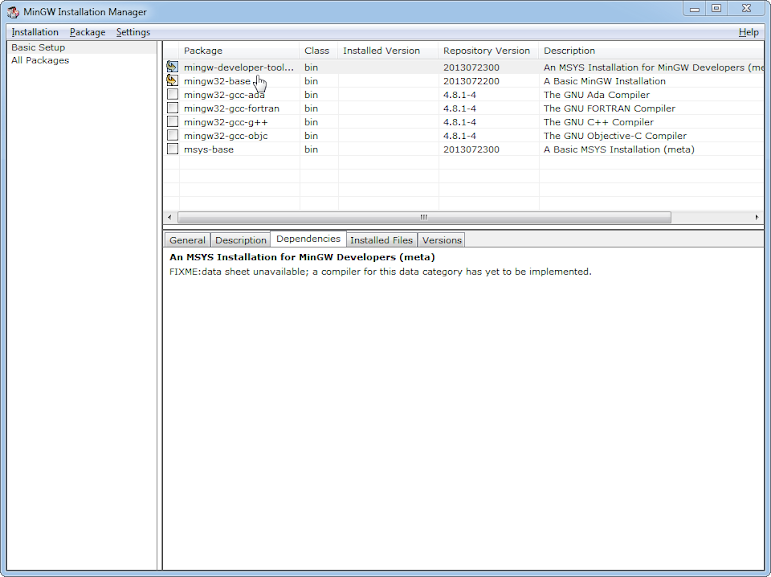
And the Installation Manager will pop up offering several options for packages.
The controls are a bit odd - when you click on the boxes it brings up a menu to ask if you want to check the box. Two clicks where one would have sufficed, but I digress.
I selected the following packages as a start:
- mingw-developer-toolkit
- mingw32-base
- msys-base
You can select more if you like by clicking on ‘All Packages’ on the left-hand side and you’ll have a lot more selections. The options I specified should get you started with a basic environment for compiling software. You can re-run the installer later to add more programs to your installation should the need arise.
When you’re done, go to the ‘Installation’ menu up top and click on ‘Apply Changes’.
This fancy window will come up to detail all of the changes that will be made:
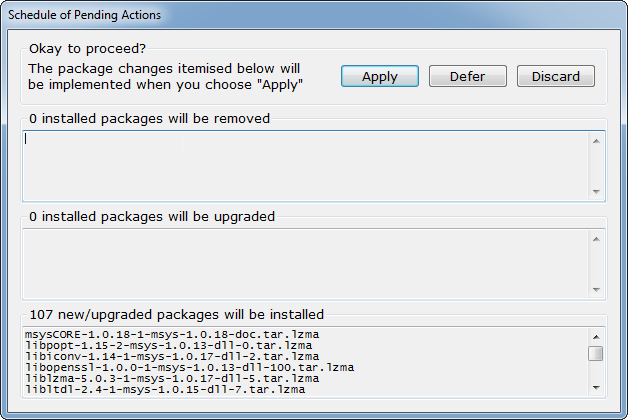
Just click ‘Apply’ and it will start downloading and install.
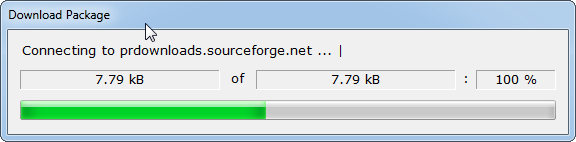
Then it changes….
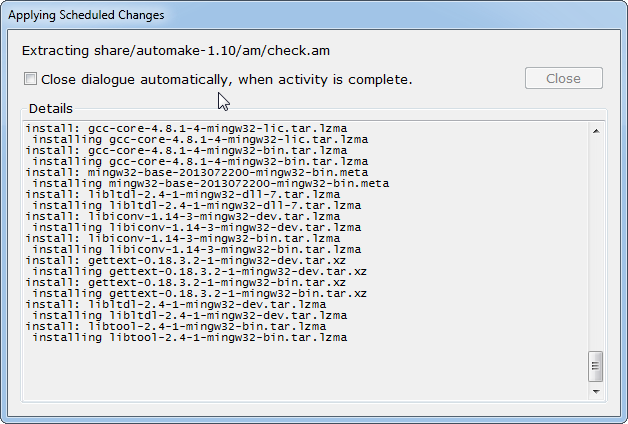
Until it’s done - then you can click ‘Close’.
See the green, filled boxes below? Those are installed now.
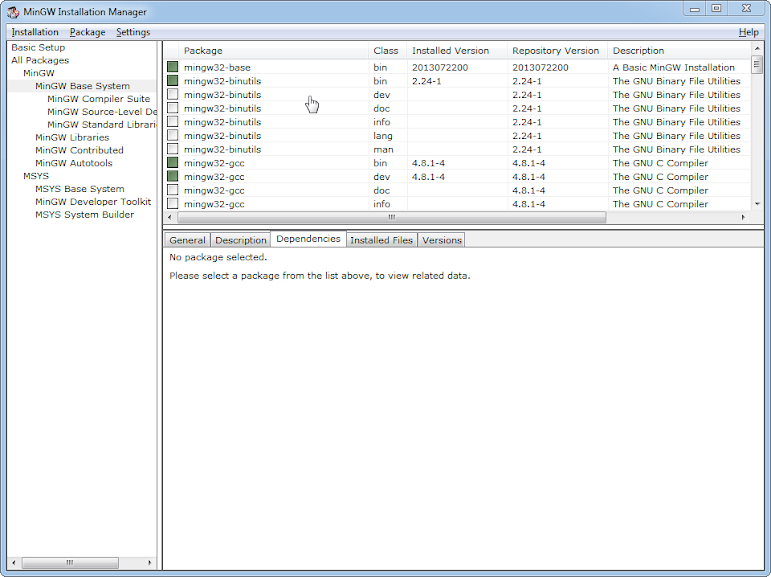
You can click on the ‘Installation’ menu and select ‘Quit’
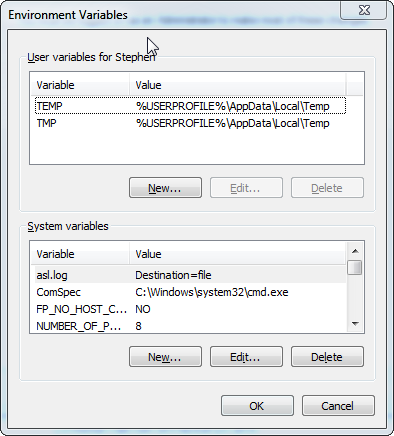
There’s just one more thing you need to do to complete the installation: add the MinGW binaries directory to your PATH. You can do that this way:
- Right-click ‘My Computer’, go to ‘Properties’
- Find ‘System Properties’ or ‘Advanced System Settings’ and click it
- There should be an ‘Environment Variables’ button - click it.
This window opens:
Click on the ‘New’ button on top and populate the window as seen below:
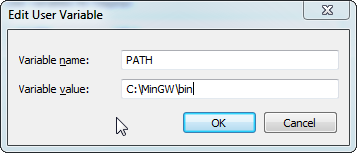
Click ‘OK’ and exit out of the rest of the windows by clicking ‘OK’ wherever necessary.
Now open up a command prompt and type ‘gcc’. You should see this:
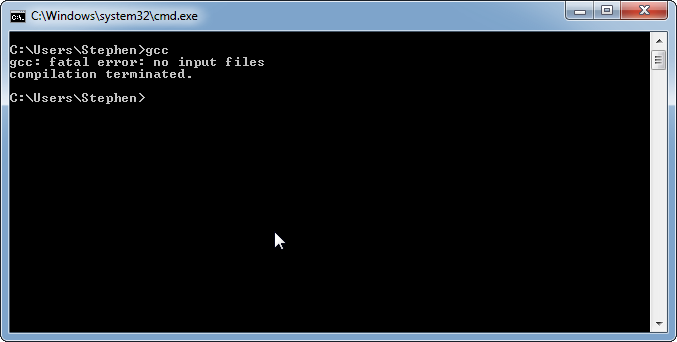
This is sign that GCC (our C compiler) installed correctly and the path is correct. you can do the same for mingw32-make and you should see this:

Success! This means we can compile C programs and create makefiles to automate the build process.
Hungry for more? The next article in this series will address creating and compiling simple C programs and automating the build process with makefiles. Along a similar vein, programmers just starting out should also review my article on directory structure for advice on organizing projects written in C.


- Comments
- Write a Comment Select to add a comment
Thank you for sharing knowledge!
I am looking forward to additional articles.
http://openwatcom.org
https://en.wikipedia.org/wiki/Watcom_C/C%2B%2B_compiler
This is rather a "funny" circumstance. Personally, I started off using visual basic, followed by a quick stint in ASM, followed by a longer "stint" in C. The after math which followed this was a conglomeration of VB.NET, C#, various other scripting languages, and finally back to C.
Back in the early 2000's I also had a problem distinguishing C++ from C. Now days, I read various posts regarding such things, and can not help but giggle. Because I've been there, and I know no one could tell me one thing or another. To convince me otherwise.
Now days, much wiser now( hopefully ) I realize that any language is but a vehicle to get from point A to point B. Still, I persist in using C since for me personally it is as easy to write code for as any other language I know. The key for me was realizing that any language is just a tool - Sure. but that libraries for various languages are equally hard, or easy to learn / use in any language.
Now days, I avoid using IDE's but instead use GNU tools such as make, and gcc from the command line. I still cling to my preferred text editor of course( which if I mentioned which editor may surprise some ). But all compiling is done via command line. Why ? Well, it started off as a learning experience, which I forced upon myself. But now, I actually view this as much simpler / less complex than using fancy tools that only get in my way. Hell, most of the time, I do not even bother with using make . . .
To post reply to a comment, click on the 'reply' button attached to each comment. To post a new comment (not a reply to a comment) check out the 'Write a Comment' tab at the top of the comments.
Please login (on the right) if you already have an account on this platform.
Otherwise, please use this form to register (free) an join one of the largest online community for Electrical/Embedded/DSP/FPGA/ML engineers:


