




Arduino robotics #3 - wiring, coding and a test run
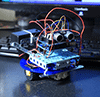
Arduino Robotics Arduino robotics is a series of article chronicling my first autonomous robot build, Clusterbot. This build is meant to be affordable, relatively easy and instructive. The total cost of the build is around $50....
Summary
This blog documents the third installment of an Arduino robotics series where the author wires, codes, and performs a first test run of Clusterbot, an affordable autonomous robot. Readers will learn practical, step-by-step wiring, Arduino firmware examples for motor and sensor control, and a troubleshooting checklist to get a DIY robot moving reliably.
Key Takeaways
- Assemble a basic wiring harness connecting an Arduino, motor driver, DC motors, sensors, and battery with attention to power and grounding.
- Implement Arduino sketches that use PWM for motor control and read sensors (e.g., ultrasonic) to drive simple autonomous behavior.
- Execute a structured test run and debugging checklist to verify motor directions, sensor readings, and battery/voltage issues.
- Choose cost-effective components and wiring practices to avoid common problems like noise, brownouts, and loose connections.
Who Should Read This
A hobbyist or entry-level embedded engineer with basic Arduino experience who wants step-by-step wiring, firmware, and test-run guidance to build an inexpensive autonomous robot.
Still RelevantBeginner
Related Documents
- Consistent Overhead Byte Stuffing TimelessIntermediate
- PID Without a PhD TimelessIntermediate
- Introduction to Embedded Systems - A Cyber-Physical Systems Approach Still RelevantIntermediate
- Can an RTOS be really real-time? TimelessAdvanced
- Memory Mapped I/O in C TimelessIntermediate