


Getting Started with NuttX RTOS on Three Low Cost Boards
If you are an embedded system developer chances are you already played with Linux on some embedded board and saw how it is powerful, right?
So, I have a good news: you can have same power using NuttX on some ultra low cost board powered by a microcontroller instead of microprocessor (that normally is way more expansive).
In fact many companies already realized it before me. It explains why NuttX is the kernel used by many IoT frameworks:
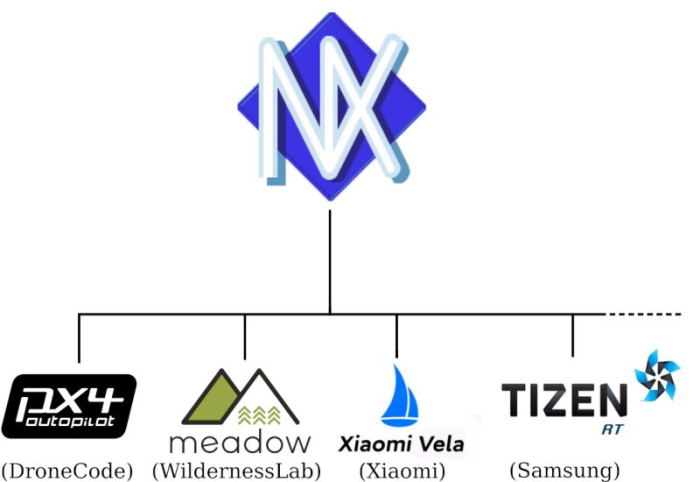
Another great news is that few days ago Xiaomi decided to convert their Vela ecosystem to open-source (https://news.itsfoss.com/xiaomi-vela-open-source/), then you could use NuttX with a rich ecosystem. Now that you know everything about it, let's to get started!
In the previous article (https://www.embeddedrelated.com/showarticle/1543.php) we saw how NuttX is organized and how you could select an application to be integrated into your final firmware image! Today you will learn how to run NuttX on real boards.
Select your board
Currently NuttX has support for more than 300 boards (according to my boards/Kconfig there are 316) and many more boards are coming. Thanks our relentless contributors!
A simple way to list all boards and profiles supported by NuttX is running this command inside nuttx/ cloned repository:
$ ./tools/configure.sh -L
You can use "grep" to filter all configs for the board you are interested to test:
$ ./tools/configure.sh -L | grep teensy-4.x
  teensy-4.x:nsh-4.1
  teensy-4.x:lcd-4.1
  teensy-4.x:sd-4.1
  teensy-4.x:lua-4.1
  teensy-4.x:nsh-4.0
  teensy-4.x:pwm-4.1
  teensy-4.x:enc-4.1
  teensy-4.x:pikron-bb
  teensy-4.x:can-4.1
  teensy-4.x:netnsh-4.1
In this case I want to see what were the board config examples for teensy-4.x board (4.0 and 4.1).
So, instead of focusing on a single board, I will give you three options (so you cannot say your board is not covered). These are the options: 1) RaspberryPi Pico powered by RP2040; 2) Espressif ESP32-Devkit powered by ESP32; and 3) STM32F4Discovery powered by STM32F407.
No matter what board you are using we need to install the prerequisites to get the NuttX building system working. You can do it for Linux, Windows, MacOS, etc, as explained here:
https://nuttx.apache.org/docs/12.3.0/quickstart/install.html
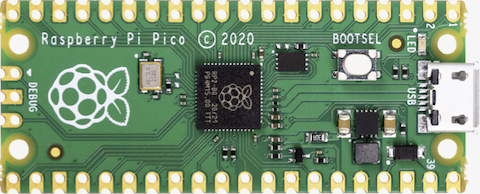
Running NuttX on RaspberryPi Pico board
The RaspberryPi Pico is a very common and low cost board released by RaspberryPi Foundation in 2021 powered by RP2040 microcontroller also created by RaspberryPi. This microcontroller is a dual core ARM Cortex-M0+ running at 133MHz and include 264KB of SRAM and no internal flash, but the RaspberryPi Pico has 2MB SPI Flash by default.
You can follow these steps to install the RP2040 SDK:
https://nuttx.apache.org/docs/12.3.0/platforms/arm/rp2040/index.html#installation
For you convenience I will reproduce these steps here:
Clone the SDK:
$ git clone -b 1.1.2 https://github.com/raspberrypi/pico-sdk.git
Export the PICO_SDK_PATH variable point to this directory, in my case I cloned it at /home/alan :
$ export PICO_SDK_PATH=/home/alan/pico-sdk
Enter in your cloned nuttx/ repository and run distclean (case you already compiled other board)
$ cd nuttx
$ make distclean
Configure to use "raspberrypi-pico" with "nsh" profile:
$ ./tools/configure.sh raspberrypi-pico:nsh
Compile NuttX running the make command:
$ make -j
At end of compilation you will see:
LD: nuttx
Generating: nuttx.uf2
tools/rp2040/elf2uf2 nuttx nuttx.uf2;
Done.
As you can see in this message the file nuttx.uf2 was created, you can see it using ls:
$ ls -l nuttx.uf2
-rw-rw-r-- 1 alan alan 262656 nov 29 18:06 nuttx.uf2
Now we can copy this file nuttx.uf2 to our RaspberryPi Pico board.
You can do it pressing and holding the BOOTSEL button on the board and connecting the USB cable from the board to the computer. Then release the BOOTSET button. A new disk will appear in your computer (on Ubuntu is show as with name "RPI-RP2".
Using your file manager copy the file nuttx.uf2 to this disk device. After few seconds it will automatically disconnect. It means that the file was copied.
Now you can connect a 3.3V USB/Serial to access the NuttX NSH terminal: connect the pin GP0 to USB/Serial RXD; connect GP1 to TXD and connect the GND from RaspberryPi Pico to USB/Serial GND pin.
Then use some serial console terminal like TeraTerm or Putty on Windows connected to this USB/Serial device configured to baudrate 115200 and 8n1 (8-bit, no parity, 1 stop bit). If you are using Linux you can use minicom or picocom and do the same configuration. You will see in the terminal:
NuttShell (NSH) NuttX-12.3.0
nsh>
Now you can interact with it:
nsh> help
help usage:  help [-v] [<cmd>]

    .           cp          exec        mkdir       rm          uname
    [           cmp         exit        mkrd        rmdir       umount
    ?           dirname     false       mount       set         unset
    alias       date        fdinfo      mv          sleep       uptime
    unalias     dd          free        pidof       source      usleep
    basename    df          help        printf      test        xd
    break       dmesg       hexdump     ps          time
    cat         echo        kill        pwd         true
    cd          env         ls          reboot      truncate

Builtin Apps:
    getprime    hello       nsh         ostest      sh
nsh>
Let see what is our NuttX version:
nsh> uname -a
NuttX 12.3.0 3ed629274e-dirty Nov 29 2023 18:06:07 arm raspberrypi-pico
That is it! Now you are able to dive deeper on NuttX World!
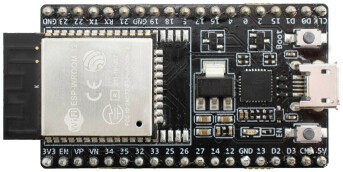
Running NuttX on Espressif ESP32-Devkit
The ESP32 is a very powerful dual-core microcontroller with WiFi and Bluetooth developed by Espressif in 2016. It was an evolution from previous ESP8266 and included much more memory and peripherals. The ESP32 is powered by two Xtensa LX6 running up to 240MHz, 512KB of SRAM and like RP2040 it doesn't have internal Flash, but normally the ESP32-Devkit with more 4MB of SPI Flash or more (depend on ESP32 module used in your board).
Before compiling NuttX for ESP32 you will need to compiler or download the toolchain and the esptool to flash the firmware into the board. Please follow these steps here:
https://nuttx.apache.org/docs/12.3.0/platforms/xtensa/esp32/index.html#toolchain
Note: you don't need to compile the toolchain (because it needs a lot of time to compile) you can just download and install the prebuilt toolchain from Espressif website.
As you will see below the steps are similar to compile NuttX to ESP32-Devkit:
Enter in your cloned nuttx/ repository and run distclean (case you already compiled other board)
$ cd nuttx
$ make distclean
Configure to use "esp32-devkitc" with "nsh" profile:
$ ./tools/configure.sh esp32-devkitc:nsh
The first time you compile NuttX to ESP32-Devkit you need to download the bootloader:
$ make bootloader
The good news for ESP32-Devkit is you don't need to copy any file manually.
Just connect your board over USB to the computer and run this command to flash it:
$ make -j flash ESPTOOL_PORT=/dev/ttyUSB0 ESPTOOL_BINDIR=.
Note: you only need to pass "ESPTOOL_BINDIR=." this time, because it will used to copy the bootloader!
If the flashing worked fine you will see this message at final:
Compressed 133472 bytes to 62240...
Wrote 133472 bytes (62240 compressed) at 0x00010000 in 1.2 seconds (effective 889.9 kbit/s)...
Hash of data verified.

Leaving...
Hard resetting via RTS pin...
Now you can run your serial console terminal configured to 115200 8n1 (note: ESP32-Devkit has a USB/Serial in the board, so you don't need an external USB/Serial like that used for RaspberryPi Pico)
Normally you will now the the boot message because NuttX already started with you connected, but if you reset the board pressing the Reset boot (sometimes with name "EN" instead of Reset) you will see it:
NuttShell (NSH) NuttX-12.3.0
nsh>
Just like we did for RaspberryPi we can get the list of current enabled commands:
nsh> ?
help usage:  help [-v] [<cmd>]

    .           cp          exit        mkrd        set         unset
    [           cmp         false       mount       sleep       uptime
    ?           dirname     fdinfo      mv          source      usleep
    alias       dd          free        pidof       test        xd
    unalias     df          help        printf      time
    basename    dmesg       hexdump     ps          true
    break       echo        kill        pwd         truncate
    cat         env         ls          rm          uname
    cd          exec        mkdir       rmdir       umount

Builtin Apps:
    nsh    sh
nsh>
And finally let see our NuttX version:
nsh> uname -a
NuttX 12.3.0 3ed629274e-dirty Nov 29 2023 18:44:43 xtensa esp32-devkitc
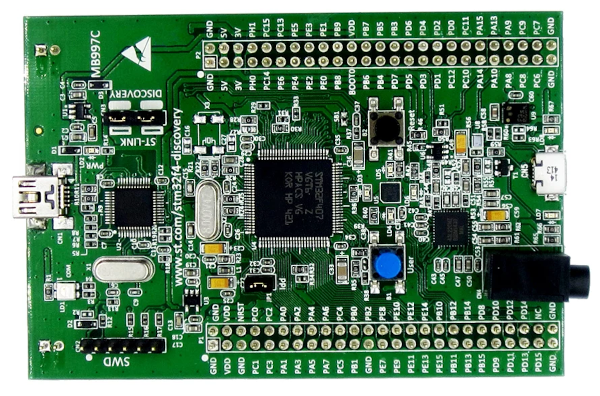
Running NuttX on STM32F4Discovery board
So, the last board we will run NuttX today is in the STM32F4Discovery board. This board is powered by STM32F407VGT6 from STMicroelectronics. This microcontroller has 192KB of SRAM, 1MB of internal Flash and runs at 168MHz. This board is very common for people working with embedded system and just like RaspberryPi Pico and ESP32-Devkit, this board is also a low cost board.
You can find more information about the NuttX support for this board in the official documentation:
https://nuttx.apache.org/docs/12.3.0/platforms/arm/stm32f4/boards/stm32f4discovery/index.html
You need to install an ARM Toolchain to compile this board, but the good news (at least for Linux users) is that you an use the default arm-none-eabi toolchain from your distro, for example on Ubuntu, Debian, etc:
$ sudo apt install gcc-arm-none-eabi
Enter in your cloned nuttx/ repository and run distclean (case you already compiled other board)
$ cd nuttx
$ make distclean
Configure to use "stm32f4discovery" with "nsh" profile:
$ ./tools/configure.sh stm32f4discovery:nsh
Compile it using the make command:
$ make -j
If your compilation finished correctly you will see at the final:
LD: nuttx
CP: nuttx.hex
CP: nuttx.bin
Now we need to flash the firmware, you can use openocd or st-flash command to flash the board.
Option 1: If you want to flash using OpenOCD, you run this command:
$ sudo openocd -f interface/stlink.cfg -f target/stm32f4x.cfg -c init -c "reset halt" -c "flash write_image erase nuttx.bin 0x08000000"
Option 2: If you want to flash using st-flash, please use this command:
$ st-flash --format ihex write nuttx.hex
Note: you also can use the ST proprietary tools to flash the firmware, it also will work fine.
Now you can connect a 3.3V USB/Serial to access the NuttX NSH terminal: connect the pin PA2 to USB/Serial RXD; connect PA3 to TXD and connect the GND from STM32F4Discovery to USB/Serial GND pin.
Use the serial console terminal configured to 115200 8n1. Then press the Reset button of the board and you will see:
NuttShell (NSH) NuttX-12.3.0
nsh>
You can also see the available commands on your board:
nsh> help
help usage:  help [-v] [<cmd>]

    .           cp          exit        mkrd        set         unset
    [           cmp         false       mount       sleep       uptime
    ?           dirname     fdinfo      mv          source      usleep
    alias       dd          free        pidof       test        xd
    unalias     df          help        printf      time
    basename    dmesg       hexdump     ps          true
    break       echo        kill        pwd         truncate
    cat         env         ls          rm          uname
    cd          exec        mkdir       rmdir       umount

Builtin Apps:
    hello    nsh      sh
nsh>
Finally let see our NuttX version:
nsh> uname -a
NuttX 12.3.0 d6191b165b Nov 30 2023 10:45:14 arm stm32f4discovery
That is it! In the next article we will see how to use more Linux-like features of NuttX and learn how it can be used to speed up our product development.


- Comments
- Write a Comment Select to add a comment
Hi Alan,
I have been following your NuttX RTOS articles from the very first one. You're doing a good job. Thank you for taking the time to explain how things work.
I was wondering if in future articles you are planning to go into how to build your own app with NuttX, how to have your code located outside NuttX's source tree, how to set up a NuttX project with CMake etc.
I would very much love to learn how to address these issues.
Regards,
Dan

Hi Dan,
Thank you very much for your kinds words, it makes me more motivated to carry on!
Yes, I will explain how to create our own application and how to integrate it on NuttX and how to use it outside of kernel tree (using NuttX as kernel library, just like people do with FreeRTOS).
Best Regards,
Alan

Hi, Thank you for this. It's motivated me to install Nuttx on a Pico board, which went just fine. Built a .uf2 file & ran it on real hardware via USB serial nsh, all is well. Then I tried to build with Cmake...not so good. There doesn't seem to be any CMakeList.txt file for this configuration! Is this something that just hasn't been done yet, or did I miss something? I don't really need a Cmake build to learn a few things here, but I would like to get this under VScode IDE, which is set up for Cmake for my current bare-metal pico board project. Just so I can be lazy & not have to think about things differently!
best regards,
bill martin
Hi Bill,
Thank you very much for your nice feedback!
Yes, CMake support on NuttX is relatively new and some boards still missing support. But it is something very straightforward to implement. If you look boards/arm/stm32/stm32f4discovery/ you will see that you just need to create the CMakeLists.txt files to compile.
It is possible too to use VSCode with Makefiles, please also take a look at this presentation about using a NuttX extension for VSCode:
Nice tutorial, I have it building with VScode now. Not doing debug yet, have to set up some hardware first.
Thanks, Bill
To post reply to a comment, click on the 'reply' button attached to each comment. To post a new comment (not a reply to a comment) check out the 'Write a Comment' tab at the top of the comments.
Please login (on the right) if you already have an account on this platform.
Otherwise, please use this form to register (free) an join one of the largest online community for Electrical/Embedded/DSP/FPGA/ML engineers:


