


Arduino robotics #2 - chassis, locomotion and power
Arduino Robotics
Beginner robotics is a series of article chronicling my first autonomous robot build, Clusterbot. This build is meant to be affordable, relatively easy and instructive. The total cost of the build is around $50.
1. Arduino robotics - motor control
2. Arduino robotics - chassis, locomotion and power
3. Arduino robotics - wiring, coding and a test run
4. Arduino robotics - HC-SR04 ultrasonic sensor
In last weeks article on beginner robotics, we talked only about motor control. This week we will look at the basic structure and locomotive system of Clusterbot and put it all together.
The chassis
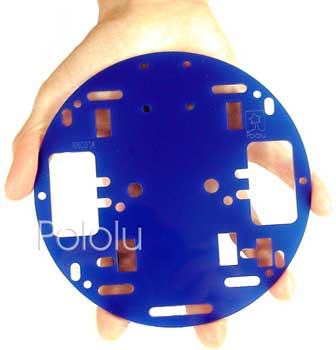
The logical place to start when building a robot is to think about a chassis, or base, to build your robot on. For my first robot, I had several requirements. It needed to be cheap, easy to use and round. As this was my first build, I really wanted to concentrate more on the control circuitry and logic rather than the mechanical aspects. Being able to easily and securely attach the motors was a priority also.
A round chassis is a perfect shape for a differential drive robot. Mounting motors on either side of a circular frame allows the robot to make zero-radius turns by driving each motor in opposite directions. This also simplifies design, as the same motors are used for propelling and turning the robot.
I chose to purchase a round acrylic robot chassis from Pololu. This chassis is only $6, and it is pre-cut and drilled for mounting a gear-box motor, wheels and a caster for balance.
Locomotion
The round acrylic chassis is made to perfectly fit Pololu's single chassis completion kit. For $18.95, this kit contains a dual gearbox motor, capable of independently controlling two axles. The kit also includes 4 wheels and two ball-casters. Basically, everything we need to build a basic robot platform, short of a microcontroller and motor driver.
Motors and Gearbox
The motors are a pair of Mabuchi 3v toy motors. I used the included motors, but the gearbox is also made to fit a pair of higher voltage, lower current motors - like these 6v motors that have a stall current of 800 mA. These motors are a better match for the TB6612FNG motor driver. The 3v motors work, but the operating voltage is near the low end of the minimum voltage of the TB6612FNG. If you opt for the 6v motors, they are only $1.79 apiece. At that price, no big deal if you burn one up accidentally. :)
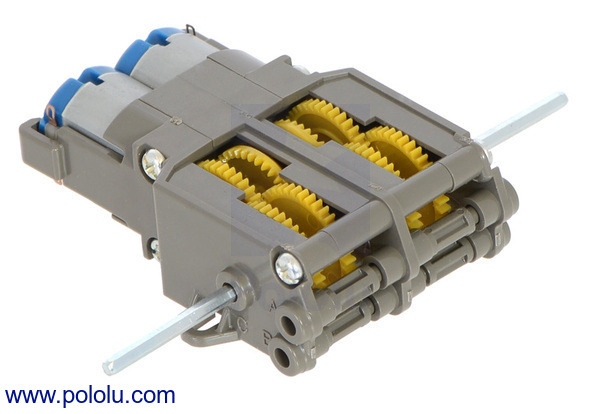
The no-load speed of our motors is 12,300 RPM. While this is amazingly fast, at that speed there is almost no torque. We can use gears to trade this excess speed for torque, so that the motors will have enough power to propel our robot. The kit I bought comes with a Tamiya twin-motor gearbox.
The Tamiya twin-motor gearbox is a rather interesting kit. You will have to assemble the gearbox yourself. The included instructions are pretty good. You can also take a look at the video below to get an idea of what assembling this gearbox is like. There are two different gear configurations to choose from - either a 58-1 or 204-1 ratio.
The speed and torque of your robot is a function of the speed the motor, gear-ratio of the gearbox, and the size of the wheels you install. I went with the 204-1 ratio on the gearbox to make sure I had plenty of torque. This ratio provides a TON of torque - I think 58-1 would have been sufficient torque with a lot more speed. The best option would probably have been to use taller wheels with the 58-1 ratio, but these are the kinds of things you learn on your first build. Ultimately, I was not very happy with how slow Clusterbot was, but it did make it easier to see how the control logic was working once I had all the sensors installed.
Wheels
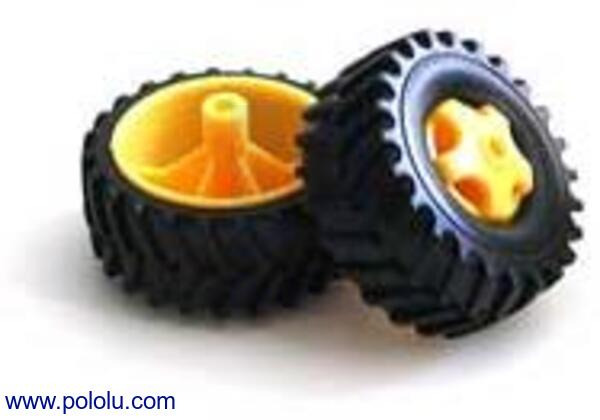
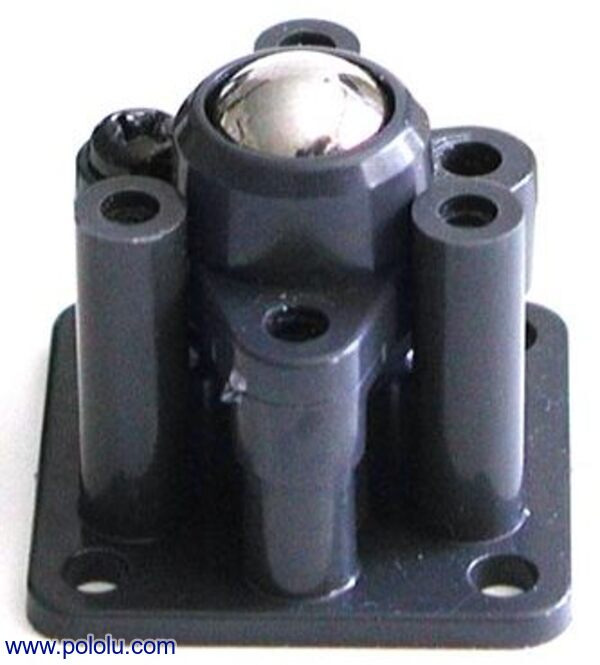
Finally, I installed the included wheels and ball caster. I found the wheels to be a bit too small for my gear setup, but they are pretty high quality and the tires are very grippy. Installation was easy, simply pushing the wheels onto the axles. The ball caster is easy to assemble and install. When installing components on your robot, you do need to remember to keep more weight over the caster so that your bot won't fall over.
Power
After assembling the basic chassis, I mounted a 2 AA battery pack. This battery pack will provide the 3V power source that the motors are rated for. The microcontroller and other electronics will be powered by a separate 9V battery. The leads from the 2AA battery pack will connect to the VMOT and GND pins on the motor driver, as discussed in Beginner robotics - motor control. You will also now need to solder hookup wire to the two poles of each motor, as I have done in the video below. Zip ties help immensely with cable management, among other things.
The microcontroller
I used an Arduino Uno as the microcontroller for this build. I mounted a prototyping shield on the Uno, which gave me a good place to mount the motor driver and make various interconnects for the robot. As you can see in the original picture of Clusterbot, I then used various pieces from one of my kid's erector sets to mount the Uno to the chassis.
In retrospect, I should have used standoffs to put a second level on the robot, the same size as the bottom level. The bottom level could have been used solely for the drivetrain and battery packs, while the second level would have plenty of room for all the electronics. These are the things you learn when you build your first robot.
Balance

I mentioned this earlier, but balance is a key consideration for a two-wheel, one caster robot. I found Clusterbot balanced on his wheels and caster fine when at rest, but would tip over when changing direction. This is why you see the 9 volt battery pack mounted on an outrigger - to get more weight over the caster. It ain't pretty, but it works.
Next time...
In the next article, we'll make the connections to the microcontroller and motor driver, write some basic Arduino code, and take Clusterbot out for a test drive.
Related Videos
Assembling the Tamiya twin-motor gearbox
Soldering hookup wires to the motors
Credits: Photos of the acrylic round robot base, Tamiya twin-motor gearbox, Tamiya truck tires and Tamiya ball caster are used with the permission of Pololu.


- Comments
- Write a Comment Select to add a comment
How come only Part1 is available in PDF format?
To post reply to a comment, click on the 'reply' button attached to each comment. To post a new comment (not a reply to a comment) check out the 'Write a Comment' tab at the top of the comments.
Please login (on the right) if you already have an account on this platform.
Otherwise, please use this form to register (free) an join one of the largest online community for Electrical/Embedded/DSP/FPGA/ML engineers:


