


Embedded Toolbox: Windows GUI Prototyping Toolkit
In this installment of my "Embedded Toolbox" series, I would like to interest you in the free Windows GUI Toolkit called QWin for prototyping, developing and debugging embedded C or C++ code on Windows.
If you work on devices with non-trivial user interfaces consisting of LCDs (segmented or graphic), buttons, LEDs, etc., QWin could be just the tool for you. It has improved my productivity in such projects dramatically. I personally consider it a gem in my "Embedded Toolbox".
The following animation shows a QWin demo running on Windows, but based on exactly the same C code that also runs on a real embedded target (the EK-LM3S811 board in this case).

Debugging on Hardware (DOH!)
I once consulted at a company building an insulin pump — a device with a non-trivial user interface consisting of a monochrome graphic LCD and a few buttons. The overall complexity of this UI was comparable to an old-fashioned candybar cell phone (which is quite significant):

Their development process was the usual Debug on Hardware (DOH!) and consisted of painstakingly slow compiling-flashing-debugging cycle on flaky prototype hardware (a repurposed evaluation board with a hand-soldered LCD). Needless to say, there was not enough of these boards for all members of the team and they needed a lot of expensive licenses for their commercial embedded tools.
When I asked them why didn't they develop the bulk of their code on the powerful and ubiquitous Windows PCs, the answer was that (1) obviously a PC is not an embedded device, and that (2) they didn't have the tools.
Later on they ended up moving parts of their development to Windows, because their hardware was in constant flux and wasn't very reliable at the time. But again I was surprised what they came up with. Their overly complex system was based on the .NET framework, managed C# code, a C++/CLI "bridge", and finally the C code compiled as C++ and packaged as a separate DLL. The build cycle was complex and the debugging of the C code — the main interest here — was indirect and rather awkward.
The Dual Targeting Alternative
Dual targeting is the main strategy for avoiding the "target system bottleneck" so typical in the embedded software development process. The term was popularized in the book "Test-Driven Development for Embedded C" by James Grenning (highly recommended).
Please note that dual targeting does not mean that the embedded device has anything to do with the PC. Neither it means that the simulation must be cycle-exact with the embedded target CPU.
Dual targeting simply means that from day one, your embedded code (typically in C) is designed to run on at least two platforms: the final target hardware and your PC. All you really need for this is two C compilers: one for the PC and another for the embedded device.
However, the dual targeting strategy does require a specific way of designing the embedded software such that any target hardware dependencies are handled through a well-defined interface often called the Board Support Package (BSP). This interface has at least two implementations: one for the actual target and one for the PC, for example running Windows. With such interface in place, the bulk of the embedded code can remain completely unaware which BSP implementation it is linked to and so it can be developed quickly on the PC, but can also run on the target hardware without any changes.
While some embedded programmers can view dual targeting as a self-inflicted burden, the more experienced developers generally agree that paying attention to the boundaries between software and hardware is actually beneficial, because it results in more modular, more portable, and more maintainable software with much longer useful lifetime. The investment in dual targeting has also an immediate payback in the vastly accelerated compile-run-debug cycle, which is much faster and more productive on the powerful PC compared to much slower, recourse-constrained deeply embedded target with limited visibility into the running code.
Prototyping of Embedded Software with Dual Targeting
Dual targeting can have many different objectives. For example, in the test-driven development (TDD) of embedded software, the objective is to build relatively concise unit tests and execute them on the desktop as console-type applications. The main challenge is management of the inter-module dependencies and flexibility of tests, but the overall architecture of the final product is of lesser concern, as the unit tests are executed in isolation using a specialized test harnesses.
However, dual targeting can also be used for (rapid) prototyping and simulating the whole embedded devices on the PC, not just executing unit tests. In this case, the objective is to build a possibly complete prototype of the embedded device as a GUI-type application. This approach is particularly interesting for embedded systems with non-trivial user interfaces, such as: home appliances, office equipment, thermostats, medical devices, industrial controllers, etc. As it turns out, significant percentage of the code embedded in all those devices is devoted to the user interface and can be, or even should be, developed on the desktop.
QWin GUI Toolkit
The free QWin GUI Toolkit enables embedded engineers to develop and debug their embedded C or C++ code as much as possible on a Windows PC with fast and powerful tools, such as MinGW, Visual C++, and ResEdit in order to avoid the "target hardware bottleneck" and the "Debugging on Hardware" (DOH!) syndrome.
![]()
The QWin GUI toolkit relies only on the raw Win32 API in C, which provides easy, direct binding to the embedded C code, and currently provides the following elements:
- Graphic display for efficiently representing pixel-addressable graphic LCDs, OLEDs, etc. with full 24-bit color.
- Segment display for segment LCDs, and segment LEDs with generic, custom bitmaps for the segments.
- Owner-drawn buttons with custom “depressed” and “released” bitmaps and capable of generating separate events when depressed and when released.
- Mouse interface capable of handling mouse moves, mouse button presses, and the mouse wheel.
How to Get It?
The toolkit is included in the QTools Collection for Windows. If you have downloaded QTools to try my QCalc Programmer's Calculator, you already have the QWin GUI Toolkit as well. Otherwise, simply download the latest version of QTools for Windows from SourceForge and unzip it on your Windows PC.
How to Use It?
QWin GUI consist of just two files: qwin_gui.h and qwin_gui.c (located in the qtools\qwin directory). The QWin GUI application is structured as a Dialog Box, which you can designed graphically in the free ResEdit resource editor tool (included in QTools). You can use a realistic background bitmap of your device, on which you place your controls, such as LCDs (graphical or segmented), owner-drawn buttons, LEDs, and any standard Window controls (static text, edit controls, regular buttons, etc.). Finally, you need to write some boilerplate C or C++ code (which you can "steal" from the provided examples) to respond to the Windows events and translate them into calls to your embedded code. All this becomes part of the BSP (Board Support Package) for Windows. (The BSP for the actual embedded target does not use any of the QWin GUI toolkit, because it provides implementation for your actual hardware).
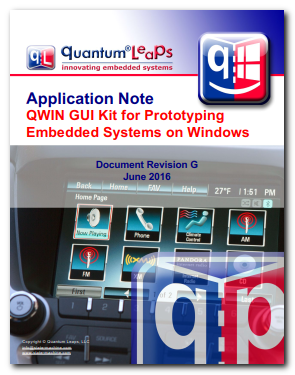
All of this is explained in the extensive Application Note "QWin GUI Kit for Prototyping Embedded Systems on Windows", which describes in detail how to build applications with QWin GUI.
Finally, regarding the size and complexity of the QWin GUI Toolkit, the implementation of the aforementioned GUI elements takes only about 250 lines of C. The example with all sources of input and a lot of comments amounts to some 300 lines of C. The toolkit has been tested with the free MinGW compiler (included in QTools), the free Microsoft Visual Studio C++ Express 2013, and the free ResEdit resource editor (included in QTools).
How is it Licensed?
The QWin GUI Kit is licensed under the open source GPL license as published by the Open Source Initiative.
Enjoy!


- Comments
- Write a Comment Select to add a comment

Hi Miro,
Can we port Qwin generated C files to another microcontroller. For example, I am extensively using Renesas RX MCUs.

Oh, absolutely. You can use QWin for prototyping any embedded target, such as Renesas RX or any other MCU. This is because QWin code (qwin_gui.c file) is compiled only on Windows, as part of your BSP (Board Support Package) for Windows. On your embedded target you don't use QWin at all. You simply implement the BSP for your embedded target. This is the essence of "Dual Targeting" advocated in this blog post.
There are also no "QWin generated C files" (perhaps you are confusing QWin with our other product called QM, which is a modeling and code generation tool.) The whole QWin consists really of just the two files: qwin_gui.h and qwin_gui.c plus some conventions how to use them to build a functional Win32 application, all described in the QWin-GUI AppNote mentioned in the blog post.
Perhaps the best way to experience QWin and get started with it is to simply download QTools and run the provided example (the already pre-compiled executable qwin_demo.exe is available in qtools\qwin\dbg\ directory). The next step is to build the demo yourself, either with the provided Makefile (for MinGW, that is provided in QTools) or with the provided qwin_demo.sln "solution file" for Visual Studio C++ (which you need to download from Microsoft). The final step is to modify the demo to resemble your own device.
Also, please note that QWin allows you to use the same screen buffers and pixel addressing scheme as in your embedded LCD, so you can exercise this part or the embedded code on Windows as well. The QWin-GUI can be then used merely for the final transformation of your screen buffer into a Windows bitmap, which happens entirely in memory and uses very efficient BitBLTs for rendering. This way you can easily achieve smooth animations.
You can also magnify the embedded LCD to any size on Windows (e.g., the image used in the blog is magnified x2 with respect to the original). This way, you can generate pixel-exact prototypes of your LCDs (perhaps magnified), so that screen shots from Windows can be used directly in the user manuals and other documentation. A working Windows prototype can be also useful for customer training, marketing presentations, etc.
--MMS
To post reply to a comment, click on the 'reply' button attached to each comment. To post a new comment (not a reply to a comment) check out the 'Write a Comment' tab at the top of the comments.
Please login (on the right) if you already have an account on this platform.
Otherwise, please use this form to register (free) an join one of the largest online community for Electrical/Embedded/DSP/FPGA/ML engineers:


